

How to enable the Departments feature
Introduction#
The Departments feature is used on large and medium-sized company websites. This allows you to divide agents into different groups, so customers be able to select a suitable department before beginning a chat session. It’s a useful feature that saves staff time when there are more specific customer requests.
In addition, you get an opportunity to send a proactive invitation to visitors from agents with a specific department. It helps you to distribute workload among agents properly.
For example, let's say that ten employees work in your company. Five — from the sales department, three — from technical support, and another two — from delivery service. So for all of the sales web-pages the proactive invitations may appear from sales managers, and for all web-pages of technical assistance and delivery — proactive invitations from technical support team and delivery agents accordingly. It is suitable!
How to enable#
To set up the Departments feature, please follow the steps below:
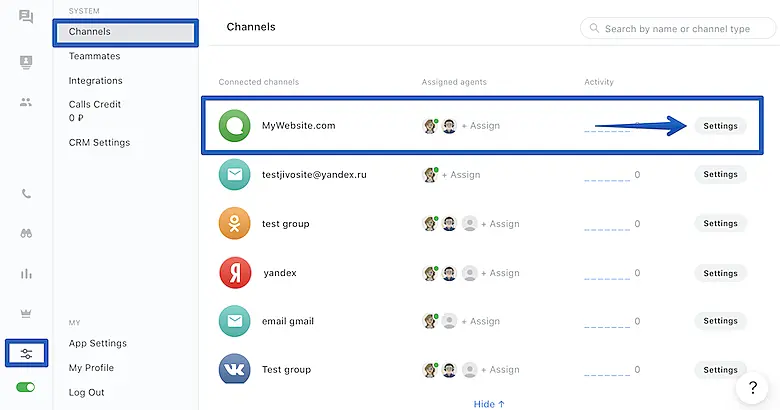
1.Open your JivoChat web app or any of our Desktop apps and go to Manage -> Channels -> Settings (next to your website channel).
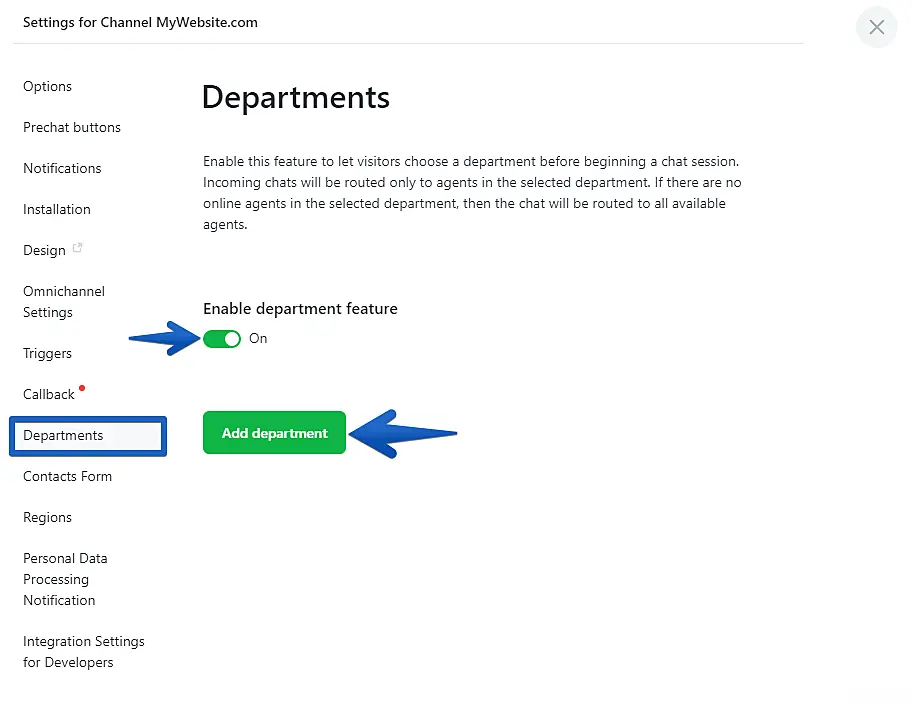
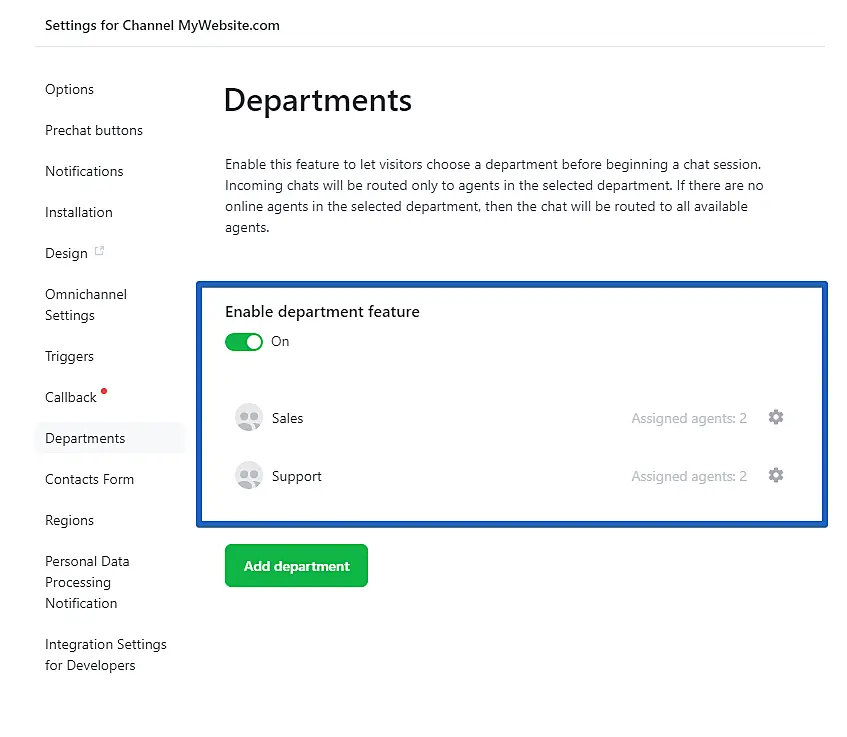
2.Go to the Departments section, click to enable the feature and add new departments.
3.Name your new department, assign the proper agents to the department you're creating and press 'Save' to create the department.
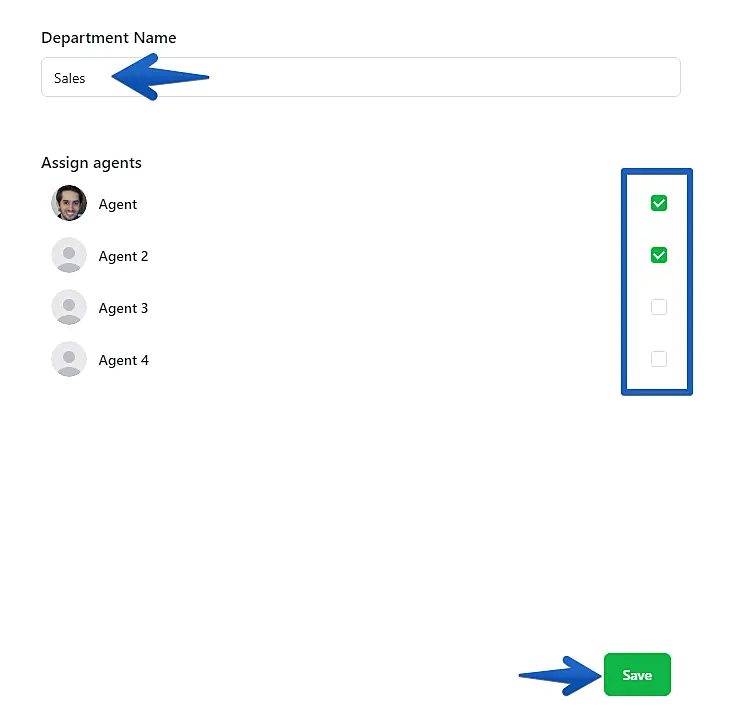
You are able to add as many departments as you need, assign the same agents to several departments and change all parameters at any moment.
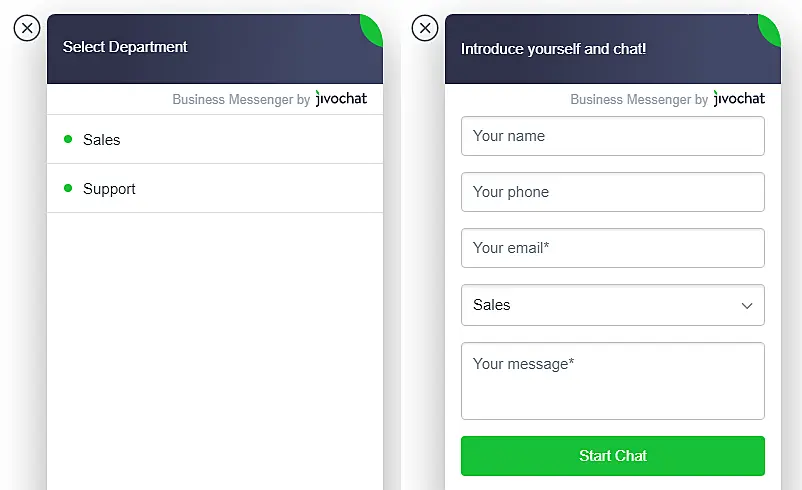
If you select to require visitors’ contacts 'Before chat' (at the 'Contacts Form' section) then the chat will be displayed as shown in the image below on the left. If you set the contact form value to 'During chat' or 'Disable', then the departments will be shown like in the image on the right.
How to enable proactive invitations for a specific department#
For setting Proactive invitations to be sent from a specific department, go to the 'Triggers' section and select 'Proactive Invitation on Every Page' (default trigger; you can do this same procedure on any new/existing trigger you have) -> 'Edit'.
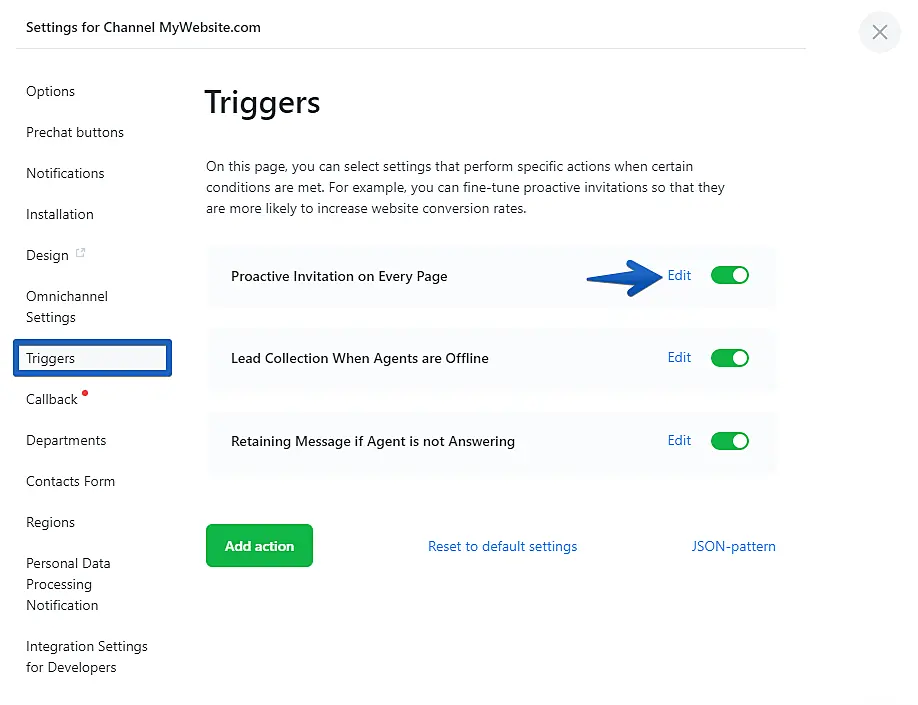
Scroll down through the trigger's settings and you should see a drop down list with the available departments to choose from. After saving your selection, the proactive invitation will work only from agents of this department.
When there are no agents online from the selected department, the trigger won't pop-up on the website.
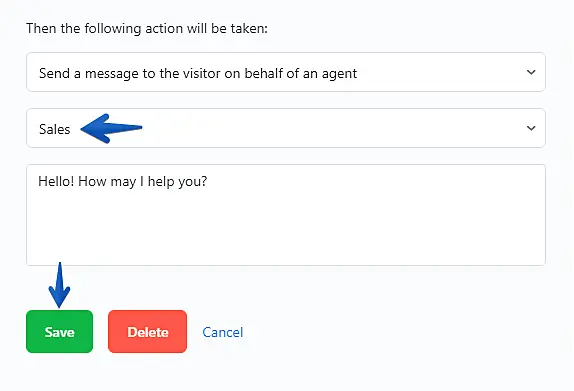
The 'Departments' feature only works with the 'Send a message to the visitor on behalf of an agent' action.
Examples
Let's say we need to show invitations from the sales department and support in accordance with the URL address of a page:
Sales: http://www.example.com/sale
Support: http://www.example.com/sup
Go to the 'Departments' section and create two departments called 'Sales' and 'Technical support', and assign the proper agents there.
Move to the 'Triggers' section and create separate actions for 'Sales' and 'Technical support' with settings like the ones shown below, with a different URL for each action:
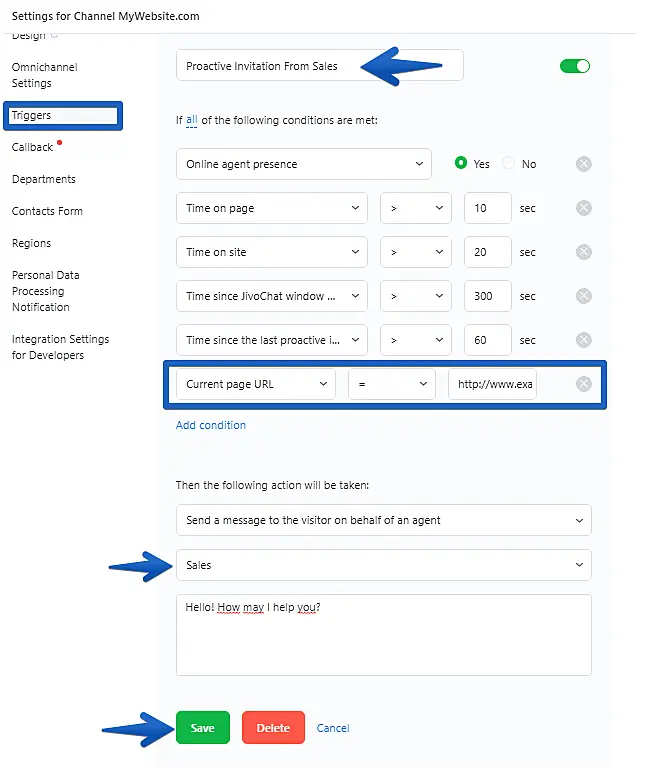
That's it. The task is completed. Now proactive invitations will be shown from agents of each department depending on the URL of the page.

